Creative Cake Decorating Ideas for Lifelong Learners
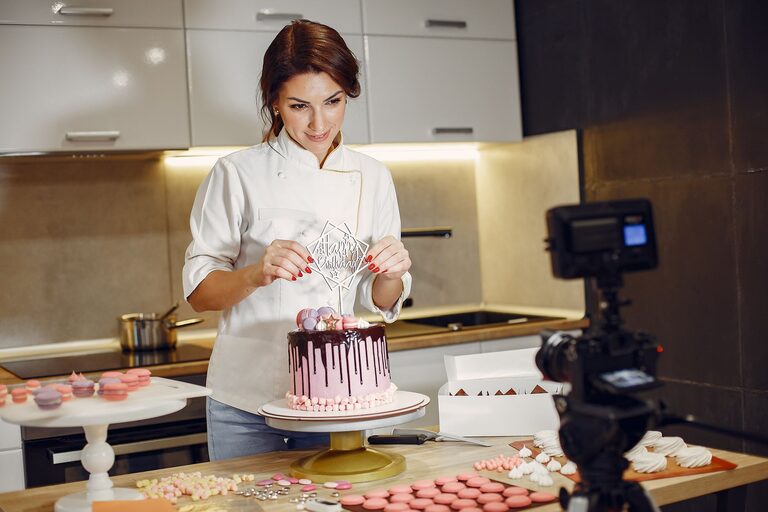
Learning to decorate cakes is a rewarding way to build kitchen skills while exploring creativity. You do not need professional equipment or years of experience to make an impressive cake. With a few basic tools, simple techniques, and a willingness to practice, anyone can create decorations that feel personal and polished.
Cake decorating is especially enjoyable for lifelong learners because every project offers a new skill to explore. You might begin with smooth frosting, then move on to piping, fondant, edible flowers, or layered designs. Each cake becomes both a finished dessert and a small creative lesson.
Start With a Simple Decorating Plan
Before mixing frosting or opening a piping bag, decide on a basic design. A plan helps you choose the right colors, tools, and techniques without making the project feel overwhelming.
Consider these questions:
– What is the occasion?
– Which colors or flavors fit the theme?
– Do you want a simple, rustic, elegant, or playful look?
– Which decorating skills would you like to practice?
– How much time do you have?
For beginners, choose one main technique and one supporting detail. For example, try a smoothly frosted cake topped with piped stars. Another option is a textured buttercream finish with fresh fruit arranged on top. Keeping the design focused often creates a more attractive result.
Practice With Buttercream Basics
Buttercream is one of the most versatile cake decorating materials. It can be spread, piped, textured, and colored in many ways. Learning to work with it provides a strong foundation for more advanced projects.
Start by practicing how to spread an even layer over the cake. An offset spatula can help you reach the sides and smooth the top. The finish does not need to be perfect. A slightly textured surface can look warm and homemade.
Once you feel comfortable spreading frosting, try these ideas:
Piped Borders
Use a star tip or round tip to create a border around the top or bottom edge of the cake. Practice holding the piping bag at a consistent angle and applying steady pressure. Small shells, dots, and stars are easy designs that add detail.
Textured Sides
Create vertical lines, waves, swirls, or ridges with a spatula. Work around the cake in sections instead of trying to finish the entire side at once. A textured design is forgiving and can hide small imperfections.
Two-Tone Frosting
Fill one piping bag with two colors of frosting placed side by side. As you pipe, the colors will appear together in a soft striped effect. This method works well for borders, rosettes, and small decorative stars.
Explore Color With Confidence
Color can transform a simple cake into a themed centerpiece. Begin with a limited palette of two or three shades. Too many colors may make the design look busy, while a small palette creates a more coordinated appearance.
Food coloring can be added gradually. Use a toothpick or the tip of a clean spoon to add a small amount at a time. Mix thoroughly before deciding whether the color needs to be stronger.
Try these combinations:
– Soft blue, white, and silver for a winter-inspired cake
– Yellow, orange, and cream for a sunny celebration
– Green, pink, and white for a garden theme
– Brown, beige, and white for a cozy coffee-inspired design
– Lavender, pale yellow, and blue for a gentle spring palette
For a more natural look, decorate a neutral-colored cake with colorful toppings such as berries, citrus zest, coconut, or chopped nuts.
Use Everyday Items as Decorating Tools
Creative decorating does not always require a large collection of specialty tools. Many kitchen items can help you create interesting textures and patterns.
A fork can make fine lines in frosting. The back of a spoon can create smooth waves. A vegetable peeler can produce chocolate curls, while a clean ruler can help mark even sections before piping.
Other useful items include:
– A small sieve for dusting powdered sugar or cocoa
– A toothpick for making fine lines and swirls
– A resealable plastic bag with a small corner cut off for simple piping
– A stencil for powdered sugar patterns
– A vegetable peeler for creating chocolate shavings
– A small paintbrush reserved for food use
Using familiar tools encourages experimentation and helps you understand how different shapes and textures are created.
Try Edible Flowers and Natural Toppings
Edible decorations can add color, height, and texture without requiring complex piping skills. Fresh fruit, herbs, toasted coconut, and chocolate pieces are all useful choices.
Arrange berries in a curved line, place sliced fruit in a circular pattern, or scatter small pieces across the top for a relaxed finish. For a more structured design, group toppings in sections by color or shape.
If using flowers, choose varieties specifically labeled as edible and suitable for food decoration. Remove stems and leaves that are not intended for eating. You can also use piped buttercream flowers if you prefer to keep the design entirely made from cake decorations.
Fresh toppings are best added close to serving time. This helps maintain their color, texture, and appearance.
Make a Themed Cake From Simple Shapes
A themed cake does not need complicated figures or detailed models. Basic shapes can suggest many familiar ideas.
For example, round piped dots can become balloons, bubbles, or flower centers. Triangles can suggest trees or banners. Small circles can be arranged into clusters that resemble grapes, clouds, or flowers.
Try creating:
– A garden cake with piped leaves and colorful flower centers
– A picnic cake with a checked pattern made from frosting
– A book-themed cake with chocolate “pages” and piped lettering
– A starry cake with dark frosting, sugar stars, and small dots
– A breakfast-inspired cake decorated with cream-colored frosting and fruit
Sketch the design on paper before decorating. A quick drawing makes it easier to arrange the main elements and avoid crowding the cake.
Learn Lettering and Personal Messages
Writing on a cake is a useful skill that improves with practice. Begin with short words and write them on parchment paper or a plate first. This helps you test the frosting consistency and become comfortable with the piping bag.
Use a round piping tip and keep your hand relaxed. It is often easier to pipe one letter at a time rather than trying to write quickly. If the message is long, consider using small flags, a cake topper, or a plaque made from fondant or chocolate instead.
A personal message does not need to be elaborate. A name, a simple greeting, or a few meaningful words can make the cake feel special.
Turn Mistakes Into Lessons
Cake decorating rarely goes perfectly on the first attempt. Frosting may become too soft, colors may look different than expected, or a design may not fit the cake as planned. These moments are part of the learning process.
Keep notes about what worked well. Record the frosting consistency, piping tip, color combinations, and chilling time. Taking a quick photo of each project can also help you compare progress over time.
If a design does not work, look for a way to adapt it. Add a textured finish, cover uneven areas with sprinkles, or turn extra frosting into simple piped decorations. Creative problem-solving is one of the most valuable skills developed in the kitchen.
Build a Personal Decorating Routine
Lifelong learning becomes easier when practice is enjoyable and manageable. Set aside time for small projects instead of waiting for a major celebration. Decorating cupcakes, cookies, or a simple loaf cake can provide useful practice without a large time commitment.
Choose one new technique for each project:
- Practice a smooth frosting finish.
- Try a new piping tip.
- Experiment with a color palette.
- Add a textured pattern.
- Arrange fruit or other toppings.
- Practice lettering or simple shapes.
With regular practice, decorating becomes less about achieving perfection and more about enjoying the creative process. Every cake offers a chance to learn, experiment, and share something thoughtful from your kitchen.